

Convert Photo to Watercolour: How to convert photo to watercolour for Storybook
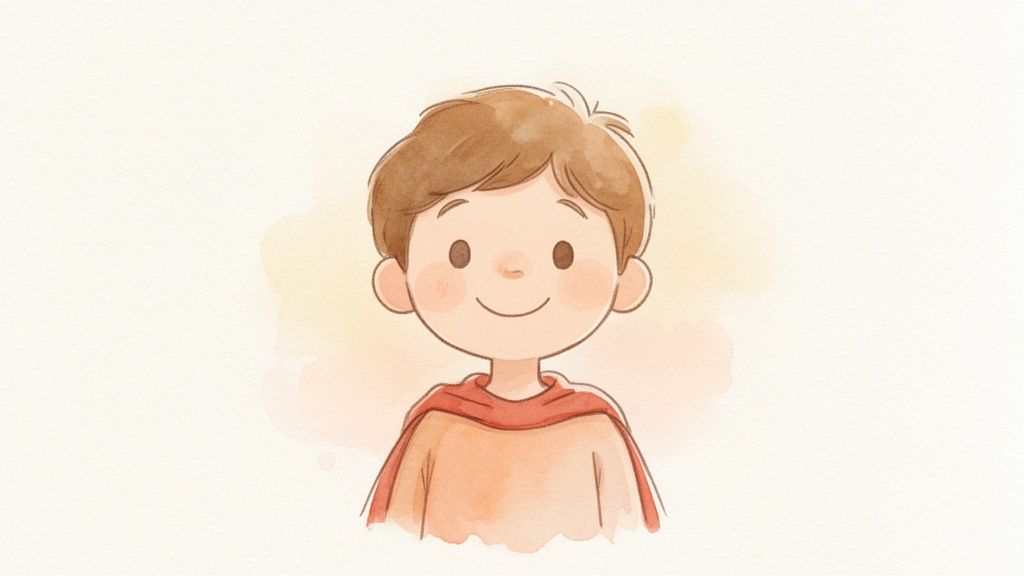
Picture this: your child's face lighting up as they see themselves as the hero of their very own storybook. You can make that magic happen! All it takes is transforming a favorite snapshot into a whimsical watercolor illustration that perfectly captures their spirit.
This isn't about slapping a generic filter on a photo and calling it a day. We're diving into the real, professional techniques creators use to craft authentic storybook art. The goal is to preserve everything that makes your child unique—that mischievous grin, the sparkle in their eye—and translate it into an enchanting, artistic style.
So, how do we get there? You've got two fantastic paths to choose from: the hands-on, creative journey of digital painting or the lightning-fast magic of specialized AI tools.
Your Two Paths to a Perfect Storybook Illustration
The first big decision is all about you. Do you want to roll up your sleeves and get artsy, or would you rather a brilliant tool do the heavy lifting?
The manual route, using amazing software like Procreate or Adobe Photoshop, puts the digital paintbrush right in your hand. This is a true labor of love, giving you absolute control over every color, texture, and detail. You get to infuse your own artistic flair into the final masterpiece.
On the flip side, AI offers an incredibly efficient way to get stunning, professional-looking results. And modern AI is so much more than a simple filter. It intelligently analyzes your child's features to create a consistent, recognizable character that can be placed in different scenes and poses—a must-have for a full storybook.
The growth here has been mind-blowing. Since 2022, major AI models have churned out over 15 billion images. To put that in perspective, it took traditional photography decades to hit that same volume! This just goes to show how powerful and accepted these tools have become for creative work.
This handy little flowchart breaks down the choice perfectly.

It really boils down to whether you're craving total hands-on control or automated magic.
Choosing Your Watercolour Conversion Method
Here's a quick look at the best approaches for turning a photo into a watercolour illustration for a children's book.
| Method | Best For | Key Challenge | Our Recommendation |
|---|---|---|---|
| Manual Digital Painting | Artists and creatives who want total control over the style and every detail. Perfect for a single, standalone piece of art. | It's time-consuming and requires some artistic skill and familiarity with software like Procreate or Photoshop. | Fantastic for a one-off illustration, like a book cover or a framed print. |
| AI Illustration Tools | Parents and authors who need multiple, consistent illustrations of the same character quickly. Ideal for creating a full book. | Getting the AI to perfectly nail a child's likeness can take a bit of trial and error with the right photos and prompts. | The go-to method for producing an entire, professionally illustrated children's book with your child as the star. |
Ultimately, the "better" method is simply the one that fits your project, your timeline, and your creative spirit.
No matter which path you take, the end result is the same: a beautiful, heartwarming piece of art that puts your child right in the middle of the story. For a little more inspiration, you should definitely check out our guide on the key elements of great children's book illustration.
Choosing the Perfect Photo to Transform into Art
The secret to a breathtaking watercolor illustration doesn't start with a brush or a fancy app. It all begins with the photograph you choose. Honestly, this one decision is the most critical step in creating a piece of art that truly feels like your child.
Think of it like building a house. The photo is your foundation. If it's weak or shaky, the whole project will feel a bit wobbly. A fantastic photo gives an artist—or even an AI—all the right information to convert photo to watercolour beautifully while keeping that precious likeness intact.
Clarity and Character Are Everything
The best photos for this kind of project are always crisp, well-lit, and high-resolution. You want to be able to see the little flecks of light in your child’s eyes, the exact curve of their smile, and the playful way their hair tumbles. Steer clear of blurry, dark, or pixelated images; they just hide the very details you want to bring to life.
But technical quality is only half the battle. The most enchanting illustrations spring from photos that are bursting with personality. I always tell people to hunt for a shot that captures a real, unscripted moment:
- A spontaneous, belly-laughing giggle.
- That wide-eyed look of pure wonder.
- A quiet, thoughtful gaze off into the distance.
These are the moments that make the final watercolor feel alive and true to who your child is. A stiff, perfectly posed school picture might be technically fine, but it often misses the warmth and soul needed for a storybook character.
My biggest tip: You're not just trying to create a likeness; you're trying to capture a personality. A photo overflowing with genuine emotion will always, always lead to a more compelling and heartwarming illustration than a technically perfect but lifeless portrait.
Why a Simple Background Is Your Best Friend
When you're scrolling through your camera roll, pay close attention to what's going on behind your child. A busy, cluttered background is a total nightmare for this process. It confuses the artist (or the AI!), making it hard to tell where your child ends and the messy background begins. This can lead to some really funky, muddled results.
You want to find a photo with a simple background—think a plain wall, a clear blue sky, or even just a soft, blurry backdrop from a portrait mode shot. It creates a clean silhouette and guarantees that all the attention stays right where it belongs: on your child's sweet face and expression. This makes the journey to convert photo to watercolour so much smoother and more successful.
A Few Quick Photo Tweaks Before You Start
Once you’ve landed on "the one," just a couple of small adjustments can make a huge difference. You don't need to be a photo editing pro, I promise. These quick fixes are all about setting your project up for a win.
- Crop with Purpose: Crop in on your child. A chest-up or head-and-shoulders view is usually perfect because it puts their facial features front and center, cutting out any extra noise.
- A Touch of Brightness: If the photo is a little on the dark side, just nudge the brightness or exposure up a bit. This helps pull out details that might be hiding in the shadows, giving the process more information to work with.
- Get the Angle Right: I've found that a straight-on shot or a slight three-quarter view of the face almost always works best. Photos where the child is looking too far to the side can make it surprisingly tough to capture a likeness that feels balanced and instantly recognizable.
Spending just five minutes on this prep work is a game-changer. It ensures your starting point is as strong as it can possibly be, paving the way for a beautiful watercolor transformation your family will absolutely adore.
The Digital Artist's Path to Watercolour Painting
There's something incredibly rewarding about rolling up your sleeves and manually transforming a photo into a watercolor masterpiece. If you have a creative spark and a tool like Procreate or Adobe Photoshop, this is your chance to really shine. This path is all about you, the artist, pouring your personal style into every digital brushstroke to capture the unique magic of your child. It’s a true labor of love, and the payoff is having complete creative control over the final piece.
This hands-on method isn't about slapping on a one-click filter. It's about building an illustration from the ground up, using that favorite photo of your child as the perfect reference. The real goal isn't to just trace a picture, but to interpret it. You get to decide what to emphasize—that mischievous twinkle in their eye, a silly smirk, or the way their curls bounce just so.
Setting Up Your Digital Canvas
First things first, let's get your digital workspace ready for action. Pull your child’s photo into your app and place it on its own layer. Now, here's a key step: drop the opacity of this photo layer down to about 50-60%. This makes it just faint enough to act as a guide without getting in the way of your own lines.
With your guide in place, create a fresh, new layer right on top of it. This will be your "sketch" layer. On this layer, you’ll start tracing the most important lines—the outline of their face, the curve of their smile, the shape of their eyes. Don't go overboard! You're creating a clean, simple line drawing, not a perfect replica.
Think of it like creating a custom coloring book page of your child. You're just building the essential structure. Once you're happy with your sketch, you can hide the original photo layer completely, leaving you with a beautiful, hand-drawn outline ready for some color.
Choosing Your Watercolour Brushes and Palette
Okay, this is where the real fun kicks in! Digital art apps are packed with incredible brushes that mimic real-world textures. Dive into the "Watercolour" brush sets and experiment. You'll find brushes with names like "Wet Bleed," "Watery Wash," or "Fine Paper Texture"—play around and see what feels right.
A few tips from my own experience:
- For big color washes: Grab a large, soft brush to lay down the base colors for things like skin tones and clothing.
- For the little details: When you get to eyelashes or the glint in their eyes, switch to a smaller, more precise brush.
- For that perfect blend: Most apps have a "smudge" or "blend" tool. Set it to a watercolor brush, and you can create those soft, dreamy gradients you see in real watercolor paintings.
To create your color palette, the eyedropper tool is your best friend. Sample the key colors directly from the original photo—the main skin tone, the shadow on their cheek, the color of their hair and shirt. This keeps your illustration grounded in reality, but still leaves plenty of room for your own artistic flair. Seeing how colors and style come together is a huge part of the fun, and you can find some fantastic ideas in our guide on crafting a compelling book cover illustration.
Building Layers of Color and Texture
The secret to an authentic digital watercolor look? Layers. It’s just like painting on paper—you start with light washes and gradually build up to richer, darker tones. I recommend creating a new layer for each main color element. Give the skin its own layer, the hair another, and the clothes a third.
Trust me, working in separate layers is a total game-changer. It gives you the freedom to tweak one part of the painting without ruining everything else. Decided the hair needs to be a little darker? No problem. You can adjust that layer on its own, leaving those perfectly blended skin tones untouched.
For the final touch that brings it all home, add a paper texture. Find a high-quality image of watercolor paper online and pop it onto a new layer at the very top of your project. Set this layer's blending mode to "Multiply" or "Overlay" and dial back the opacity. This one subtle step can instantly make your digital art feel like a classic, hand-painted treasure.
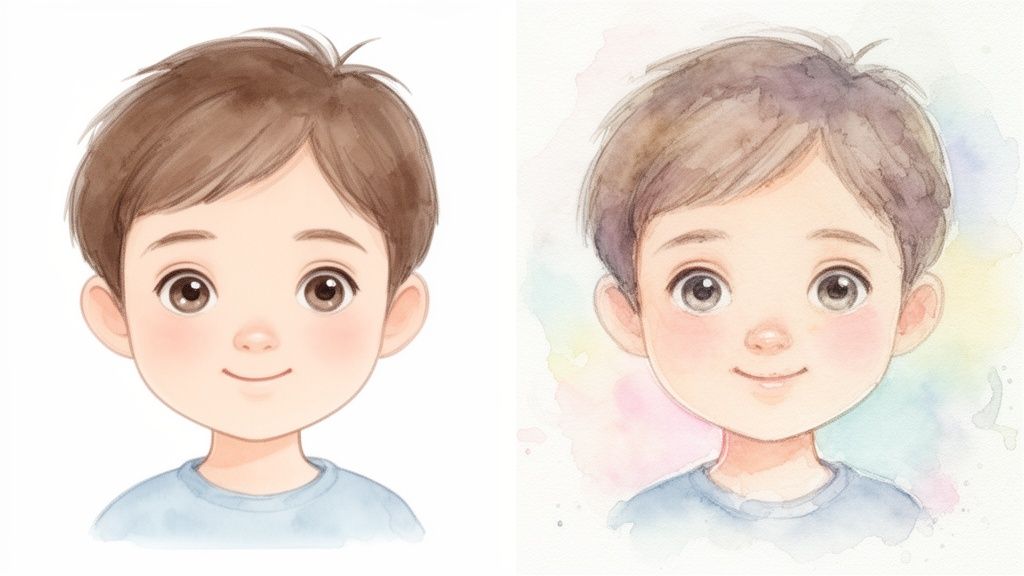
Using AI to Instantly Convert Photo to Watercolour
Ready to jump into the future of illustration? If the idea of digital painting feels a little daunting, there's an incredible shortcut that delivers stunning, professional results. Using AI to convert a photo to watercolour is an absolute game-changer, especially when you're dreaming of creating an entire personalized storybook.
Let's be clear: modern AI is light-years beyond a simple social media filter. It doesn't just slap a watery texture over your picture. Instead, it intelligently studies your child's photo, identifying the key features that make them them—the specific shape of their eyes, the curve of their nose, and that one-of-a-kind smile.
From that analysis, it creates a unique character model. This is the secret sauce! This model is what ensures your child's likeness stays consistent from page to page, whether they're laughing, looking surprised, or lost in thought.
Mastering AI with Effective Prompts
The real magic begins when you learn how to "talk" to the AI using text prompts. Your words are the art director, telling the software precisely what kind of watercolor world you want to create. If you're vague, you'll get vague, generic results. But get specific? That’s when the real creative power is unlocked.
Think of it like commissioning an artist. You wouldn't just say "paint my kid." You'd give them details! Here are a few prompts to get your gears turning:
- "Soft, gentle watercolor illustration of a child with blonde curly hair, whimsical children's book style, pastel colors, clean white background."
- "Vibrant and expressive watercolor painting of a young boy laughing, with loose brushstrokes and bright, cheerful colors."
- "Charming storybook character in the style of Beatrix Potter, soft watercolor washes, with a friendly expression."
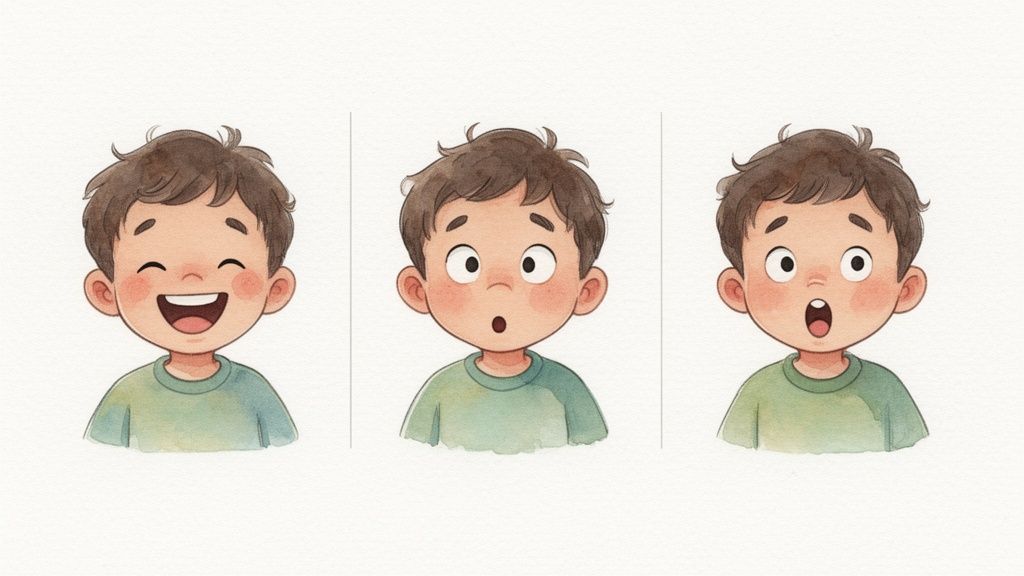
The screenshot below gives you a peek into the sheer variety of artistic styles you can play with.
Notice how each option has a completely different vibe? Your prompts are what guide the AI to land on the exact look and feel you're going for.
This explosion in creative AI is part of a massive trend. The AI image editing market, which covers these photo-to-art tools, was valued at a whopping $15.2 billion in 2023. That incredible growth just goes to show how much people are loving this kind of creative power, making personalized projects more accessible than ever before.
Key Takeaway: The quality of your AI artwork comes down to one simple formula: a great starting photo plus a super-descriptive prompt. For a deep dive into what makes a photo perfect for this process, check out our complete image guide.
Why AI Is Perfect for Storybooks
So, what's the biggest win here? Speed and consistency. Hands down. Illustrating a 20-page book by hand could take weeks, if not longer. An AI, on the other hand, can generate a whole set of beautiful, cohesive illustrations in a tiny fraction of that time. It's this efficiency that makes a fully personalized book a realistic project for busy parents and creators.
By learning to guide the AI, you get a whole series of illustrations that don't just look amazing but are all unmistakably starring your child. And that’s how you create that priceless moment—when they open the book and see themselves as the hero of their very own story.
Keeping Your Character Looking Consistent Through the Whole Story
Alright, so you've managed to convert a photo to a watercolor illustration, and it looks incredible! That's a huge win. But for an entire storybook, that first beautiful image is just the opening act. The real challenge? Making sure your little hero on page five looks just like the same hero on page fifteen.
This is a classic hurdle in personalized book projects. If you're not careful, your character can start to look a little… different from one scene to the next, and that can pull a reader right out of the story's magic.
But don't worry! Whether you're a hands-on digital artist or tapping into the power of AI, there are some fantastic, battle-tested techniques to lock in that likeness and make your star character shine from cover to cover.
The Digital Artist's Secret Weapon: A Simple Style Guide
If you're painting each scene yourself, a mini style guide will be your best friend. I'm not talking about some massive, corporate brand book—just a simple, one-page reference sheet that becomes your visual North Star. It's the key to making sure every single illustration feels like it belongs in the same world.
First up, nail down your color palette. Pop open your very first illustration and use the eyedropper tool to grab the exact hex codes for all the important colors.
- Skin Tones: Sample the main tone, a slightly darker shadow color, and a brighter highlight.
- Hair Color: Snag the primary shade and maybe a darker one for depth.
- Eye Color: Get that exact shade of blue, hazel, or brown.
- Clothing: Pick out the main colors of their go-to outfit.
Jot these codes down right next to a little screenshot of your main character. This tiny bit of prep work saves you from accidentally using a slightly different shade of red for their boots halfway through the book. It’s a small effort that pays massive dividends in creating a polished, professional look.
The AI User’s Trick: Locking in a Likeness
Working with AI is all about giving it the right directions. Modern AI tools are surprisingly good at keeping a character consistent, but you have to show them what you want. The most powerful way to do this? Use a seed image.
Your seed image is that original, perfect illustration—the one you generated that looks exactly right. It’s your golden ticket. When you go to create new scenes, you simply reference this image in your prompt. You’re essentially telling the AI, “Hey, see this kid? Make the new picture with this exact kid in it.”
This approach is a total game-changer. It goes way beyond just describing things with words and gives the AI a direct visual anchor. The result is a dramatic leap in the consistency of your character’s face, hair, and overall vibe from one page to the next.
When you pair a seed image with a good text prompt, you’ve got a recipe for success. You can ask for different actions or emotions while the core look of your character stays put. For instance, your prompt could be something like: “Using the seed image, create a soft watercolor illustration of the same character looking surprised, whimsical children’s book style.”
This combination of a visual guide and a clear description is how you create a believable hero who can jump for joy, feel a little sad, and go on grand adventures, all while looking unmistakably like your child.
Got Questions About Turning Photos into Watercolors? We've Got Answers.
Jumping into any new creative project can feel like a big step, especially when it involves turning a precious photo into a work of art for a children's book. You want it to be perfect, and that's totally understandable!
Over the years, we've heard just about every question in the book. So, let’s walk through some of the most common ones and get you feeling confident about this whole process.
What Kind of Photo Works Best?
Think of it this way: the better the ingredients, the better the final dish. A clear, well-lit, forward-facing photo is always your best bet. High-resolution images are a game-changer because they capture all those tiny, unique details—like the sparkle in an eye or a single dimple—that make your child, well, them.
An artist (or even a smart AI) can work wonders, but they can't create detail that isn't there. Giving them a crisp, clear photo to start with is the single best thing you can do for a great result.
Here's a quick checklist for the perfect source photo:
- See Their Whole Face: Make sure there are no hats, sunglasses, or heavy shadows covering their features.
- Keep the Background Simple: A busy background can be distracting. A simple one helps your child stand out and makes the conversion process much cleaner.
- Capture a Real Emotion: A genuine, unposed smile or a look of pure curiosity will translate into a much more heartfelt illustration than a stiff, "say cheese!" photo.
The real secret sauce is a photo that's bursting with your child's personality. That’s what gives the artist the emotional blueprint to create an illustration that doesn't just look like them but feels like them, too.
Will an AI-Generated Image Really Look Like My Kid?
Oh, absolutely! The technology today is honestly mind-blowing. We're way past those cheesy, one-click filters that just slapped a watery texture over an image. Modern AI tools are much more sophisticated.
Today's AI actually performs a deep analysis of the photo you provide. It maps out the unique structure of your child’s face, from the exact shape of their eyes to the way their hair falls. From there, it builds a custom character model. It’s this personalized model that ensures the hero of your story is instantly recognizable as your child, keeping that all-important likeness consistent from page to page.
Do I Need to Buy Expensive Software?
Not at all! You can definitely get stunning results without breaking the bank. While a powerhouse program like Photoshop has every bell and whistle imaginable, it's often overkill. Fantastic and much more affordable tools like Procreate for the iPad give you incredible manual control for a fraction of the cost.
And if you want to skip the learning curve entirely, many of the best tools to convert photo to watercolour are simple web-based platforms. No downloads, no installations. The right tool for you just comes down to whether you want the hands-on fun of digital painting or the speedy magic of an AI-powered assistant.
Ready to see your child light up as the star of their very own adventure? At Torah Tales, our AI brings your photos to life, creating a beautifully illustrated and personalized book your family will cherish forever. Create your custom storybook today!
